Reporting using UI
One option is to generate a report from the UI. Let's consider two scenarios: without and with a template group.
Without template group
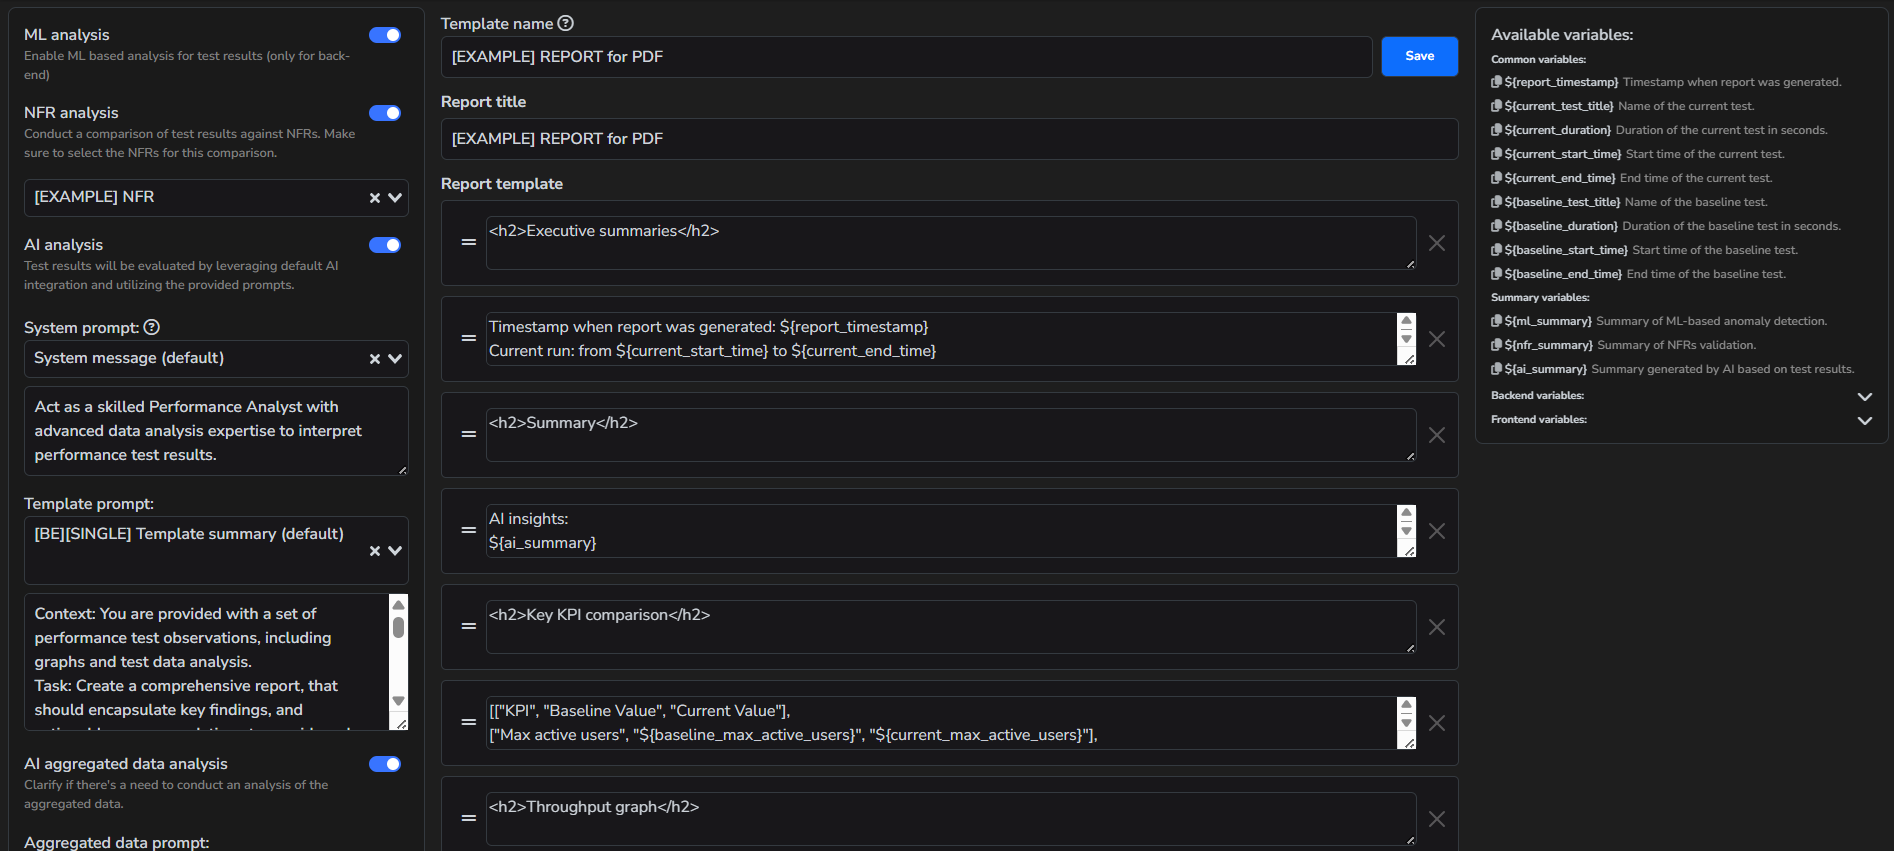
- Let's assume that we need to generate report in PDF format. All integrations. prompts and graphs are configured. We'll start with creating a template. In this example, we enabled ML, NFR, and AI analysis for the report by selecting the corresponding checkboxes, as well as choosing the appropriate prompts.
- In the next step, we will need to open the 'Tests' tab and ensure that the correct InfluxDB configuration is selected. If the InfluxDB configuration is set up correctly, you'll see a list of tests.
- Click on the checkbox corresponding to the test for which the report should be generated.
- Choose the template in the second column. In our case it is PDF file.
- Optionally, if needed, you can provide additional context for each test by simply clicking the 'Additional Context' button.
info
If you want to create a comparison report and ensure the baseline variables are active, simply select the baseline test title in the 'Baseline test' column.
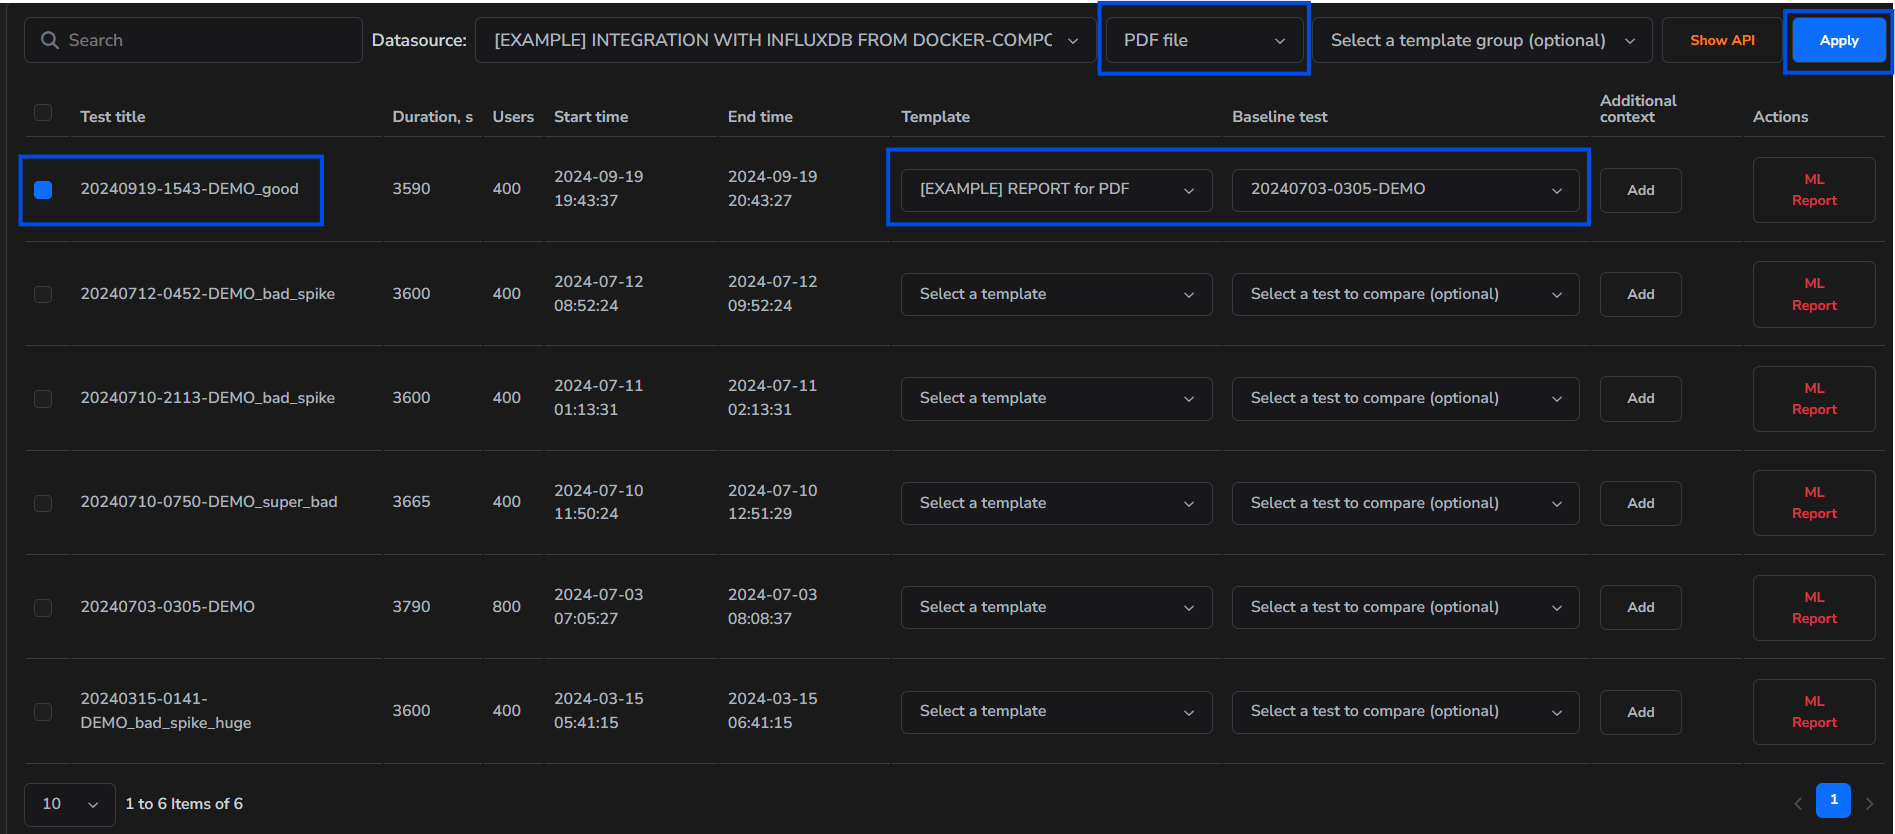
- Click the Apply button. This will initiate the generation of the report.
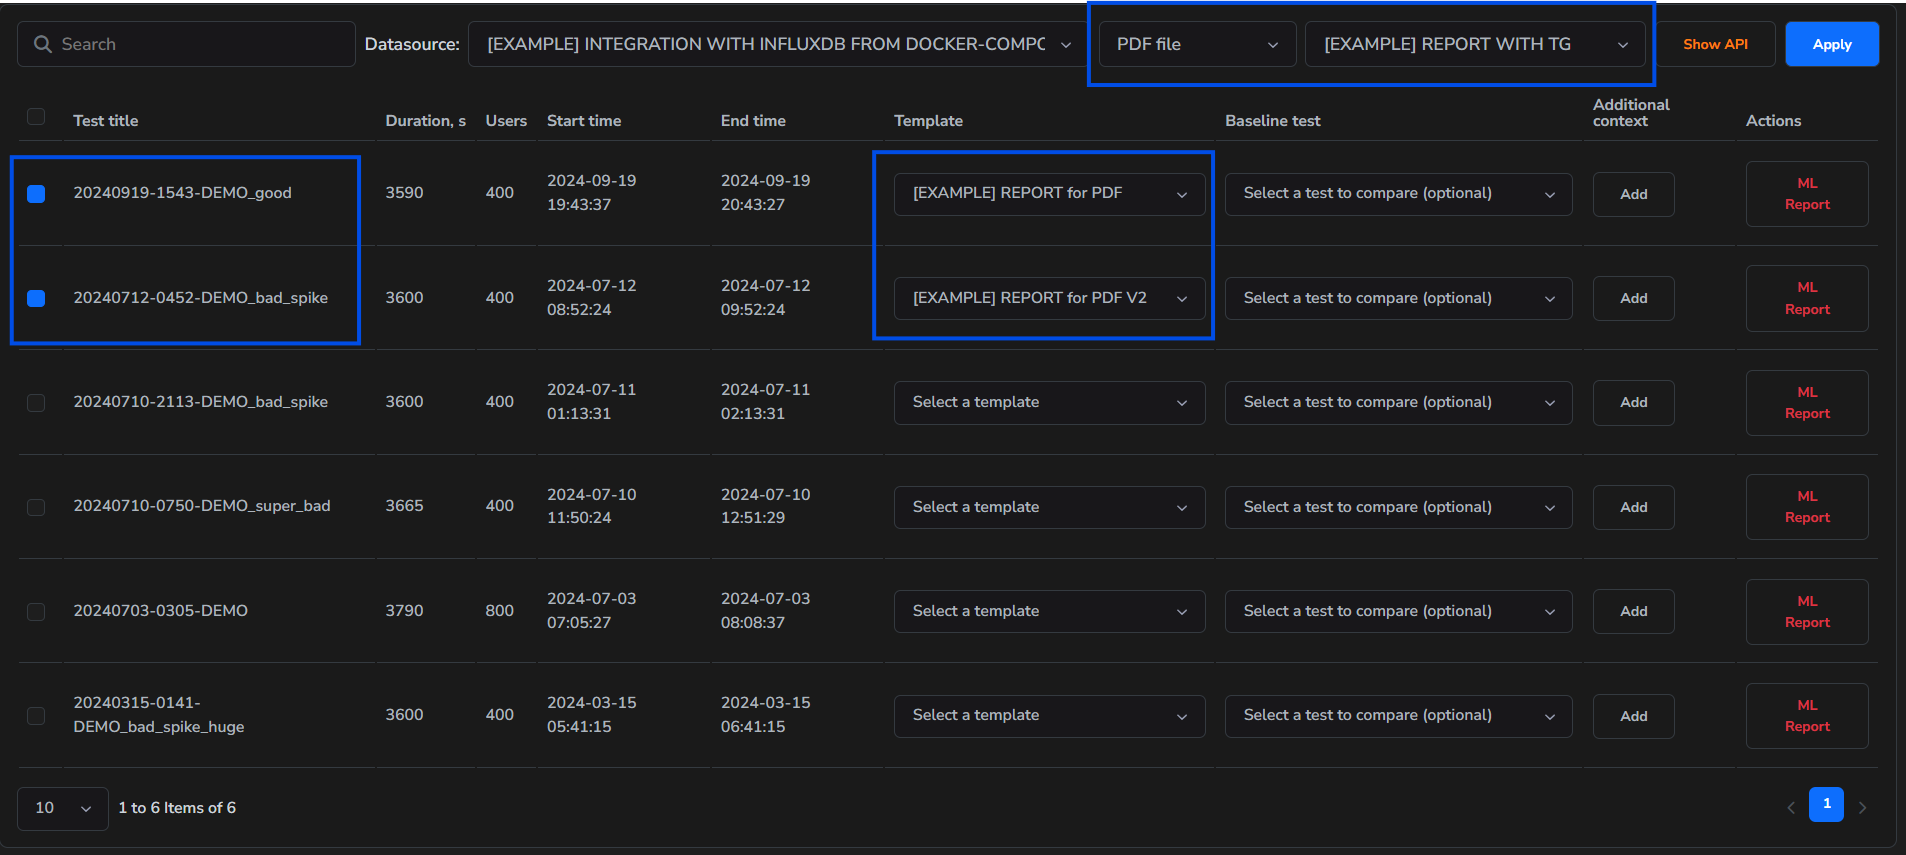
With template group
- Let's say that we need to generate a report in Azure Wiki for a fixed load and ramp-up test at the same time. All integrations, prompts, and graphs are already configured.
- Create templates for both tests.
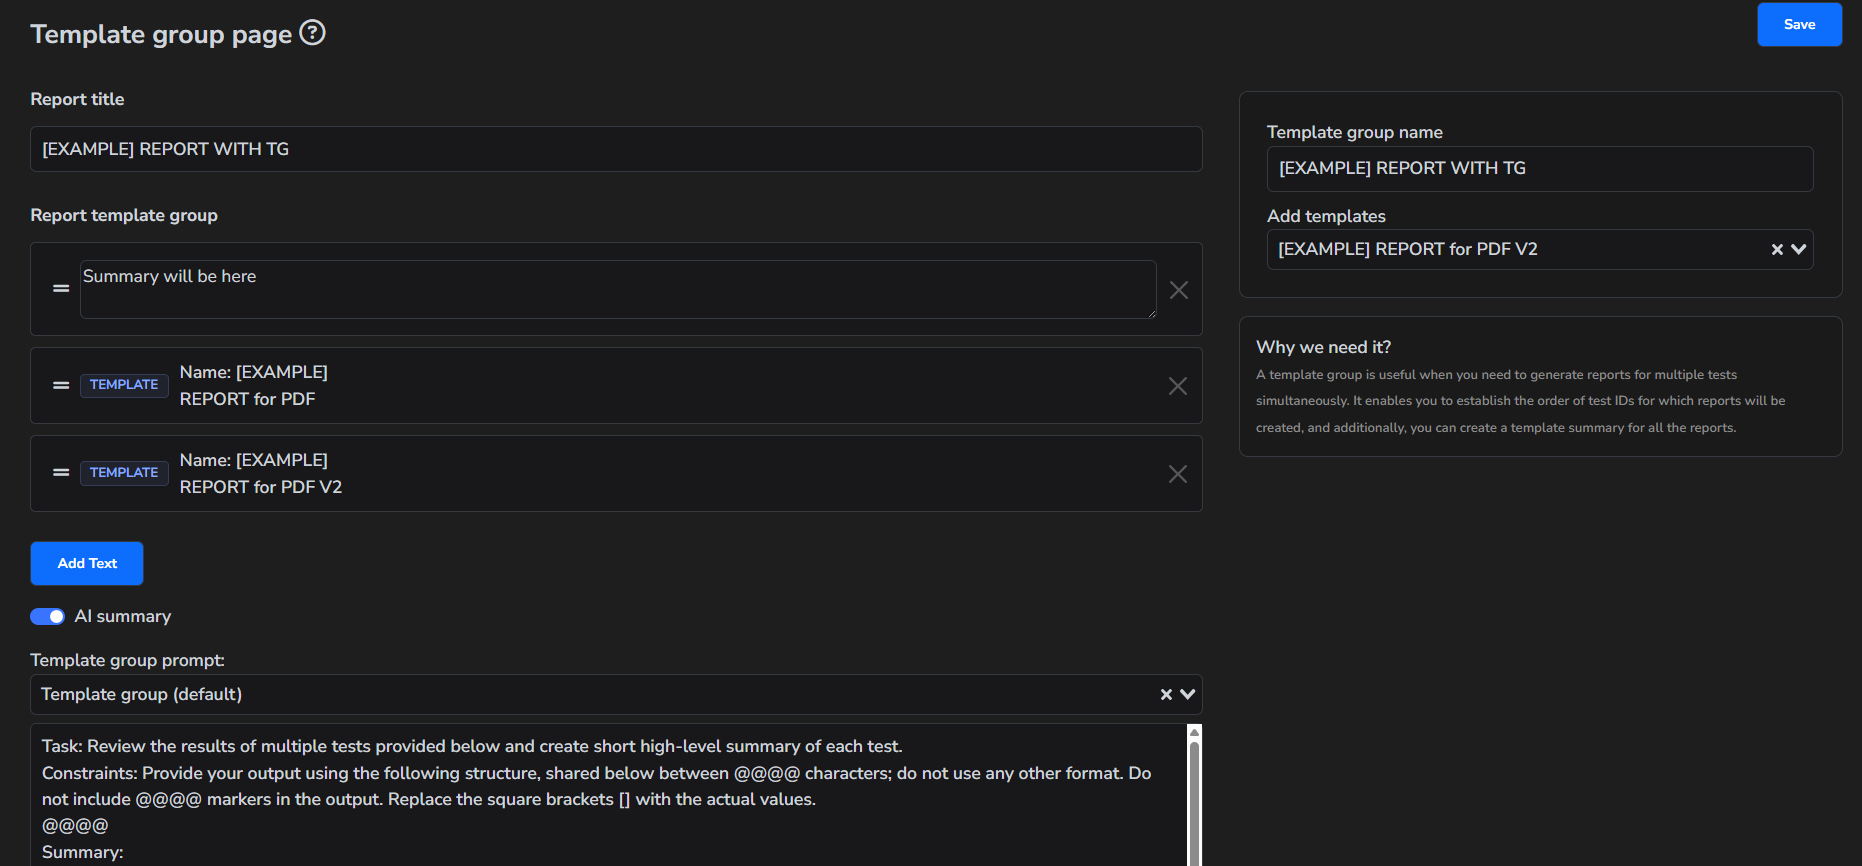
- Next, we need to create a template group, where we can determine the order of our templates.
warning
It's important to note that variables cannot be used in template groups.
- Click on the checkbox corresponding to the test for which the report should be generated.
- Choose the template in the second column for each test.
- Choose the template group that will be used. In our case, it's [EXAMPLE] REPORT WITH TG.
- Optionally, if needed, you can provide additional context for each test by simply clicking the 'Additional Context' button.
- Click the Apply button. This will initiate the generation of the report.